
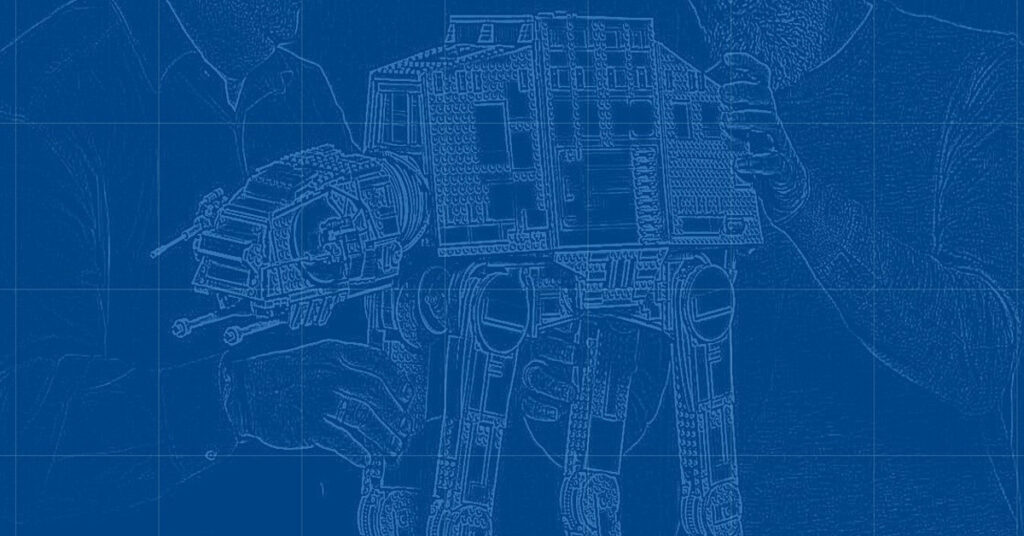
As any kid knows, the best way to build a LEGO set is to dump out all the bags on the floor, and then pour the pieces into a giant pile, right? That might be true for a great number of models but 75313 AT-AT takes a fair amount of planning, effort, and time – and with the growing number of adults joining the LEGO Star Wars community we thought that a guide on how to build this behemoth is in order.
Whether you’re a newly minted builder or a long time fan, knowing a few basic pieces of advice are worth learning before jumping in feet first:
- learn the different types of LEGO pieces, because there are more in the modern inventory than just plates and bricks these days,
- understanding the geometry of how LEGO pieces stack up will help you comprehend some of the basic design elements of the model,
- knowing some of the general LEGO building concepts will ensure that you’ll get the hand of how the Imperial walker is built, as well as spot any surprises, and
- unless you’re a master builder, taking some time to organise the elements you’ll be building with will makes things easier in the long run.
With the preamble out of the way, it’s time to get stuck in.
The first thing you need to know about 75313 AT-AT is that it’s a set like no other, because – differing from every other LEGO set made – the instructions from this model don’t come as one big book but are broken down into four booklets.
What this means is that – instead of beginning at the start of the instructions – you can commence at any one of the four instruction booklets. In fact, building this UCS AT-AT needn’t be limited to one person’s effort, because each box can be tackled by another builder (or group of builders) simultaneously, knocking hours off the total build time (which averages between 12 and 24 hours depending on skill level).


Each box is a distinct section; box one contains the hips and upper legs, box two covers the feet and lower legs, the structure of the main body comes in box three, while the final box has the head/cockpit, armor plating, and speeder bikes.
While the obvious place to start would be the feet and then work upwards, LEGO has you building the hips and upper legs first instead, but there’s no reason why you couldn’t get stuck into one of the other boxes first.
Whatever order you choose to build it, here are some tips we can share to make it easier for you.
Box 1
The first stage of the build is the chassis; a bulky base made of Technic beams that acts as the framework for the hips. While building this section you’ll want to pay close attention to where the friction pins go, because getting them in the wrong place will impact how well subsequent layers attach.
Building the hips and upper legs is easier done in parallel rather than in sequence so to avoid the dreaded 2x steps, do them together. Pay close attention to steps 129 and 178 – these are the ones that caused much consternation in the community when Brickset raised concerns that it wasn’t reversible.
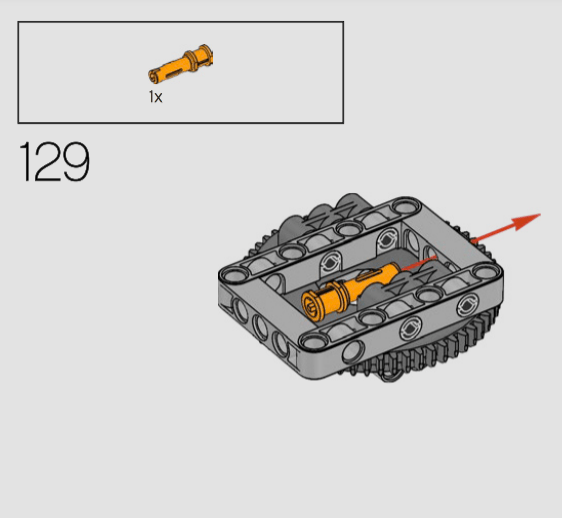

The real issue is that it’s an easy step to get wrong, and a tough one to correct. To address the issue LEGO produced a tips and tricks video, presented by set designer Henrik Andersen, explaining how to disconnect this difficult-to-reach piece.
Box 2
The second box adds the foundation to the model – its feet and legs. Building in groups of four is faster and will help your concentration, but there’s no getting around the fact that the x4 builds are monotonous, so find ways to challenge yourself to keep the pace up.
While the feet are fun, lower legs are a bit of a slog and need a fair amount of care – especially when placing the cladding – because getting these wrong will inhibit the posabiity of the finished model.
Overall, completing this box gives a sense of progress but connecting the lower legs with the upper half of the build is tricky, so don’t jump in feet first.
You might be tempted to put the completed results of box 1 on its back and fit the legs in from above – don’t! Instead, roughly position the four lower legs and drop the upper section onto them. It’s awkward but far less risky. Keeping them vertical is the way to go, and don’t be tempted to give them a cool walking pose yet. You’ll want to hold off until the very end.
Until step 335 is finished the whole structure is still wobbly, so make sure the legs are vertical and the model is positioned where you want it until these eight plates are fixed in place.
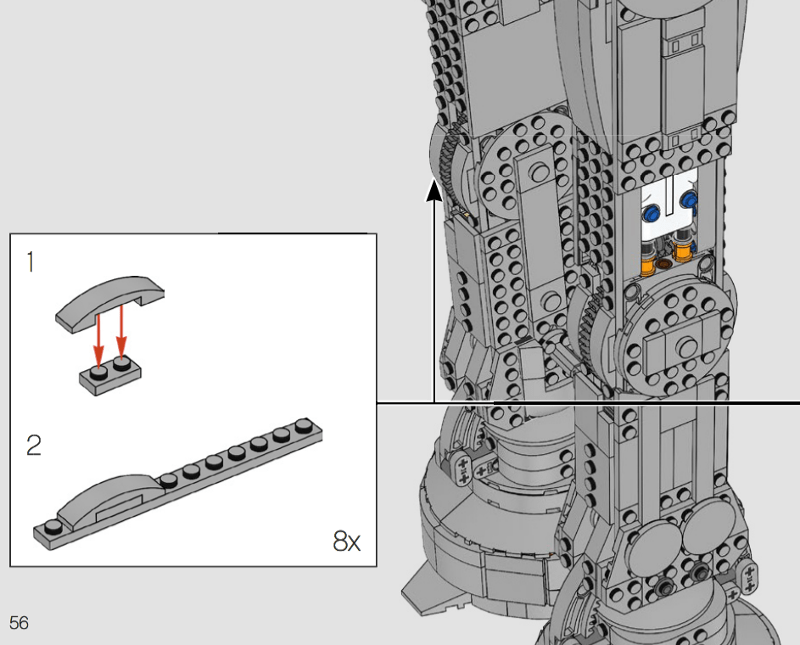
Your nerves will be stretched thin at the thought of how much of the set’s stability relies on such small fixtures, but believe in the designers and have faith in clutch power!
Box 3
After two lengthy bouts of repetitious building, assembling the structure of the main body comes as a relief.
The most satisfying part of the third box is adding the rows and rows of seats. It’s a particularly evocative step, especially for those collectors wanting to fill their AT-AT up with snowtrooper minifigures.
Positioning the main troop compartment and neck on the free-standing structure that supports it is a little nerve-wracking, and eye-balling the yellow liftarms into position can be tense but once the first axle is in and pinning the upper and lower halves together, the rest slip straight in.
This isn’t true for the long axle that holds the neck to the body, so expect to spend some extra time wiggling the assembled pieces around until the axle drops in.
Don’t get too excited at the promise of adding the AT-AT’s iconic cockpit to your build because the illustration at the start of bag 13 is incorrect, and the cockpit is included in the fourth and final box.

Instead, the thirteenth and final bag of this stage adds some delicate detailing to the section below the troop compartment, including the brackets on the inward side of the AT-ATs hips. You’ll soon learn to loathe these, as they easily fall off every time you pick up the set, so put them to one side until the build is finished.
Box 4
The last box of the build adds all the finishing touches – the cockpit, all the paneling around the troop compartment, and the speeder bikes.
The cockpit is probably the most exciting part of this sectional build, though keeping the side panels fixed in place while you add to the head unit is frustrating. This is a problem that every AT-AT set has had to date, so if you’ve built any of the other System-scaled models you’ll already know what you’re in store for.
It’s a pretty straightforward section to get through, though two points do need to be made: fitting the outer armor plates to the main body does take a bit more patience and deftness than you’d expect, and until you learn how to open the troop hatch expect to be refitting the side panels frequently.
All that’s left to complete are the two speeder bikes, the e-web cannon and the last of the remaining minifigures – essentially one-half of the 75320 Snowtrooper Battle Pack which is due out with the Winter wave of new LEGO sets this coming January.
And with that, you’re done!
If this set has whet your appetite for big builds then why not look to the other Adult Collector sets that are currently available?
The current record for the longest set is held by 10294 Titanic at 53 inches/135 centimeters), while the widest set – at 23.6 inches/60 centimeters – is 75192 Millennium Falcon, and the set with the most pieces is 31203 World Map.
How did your build go? Share your build experience and time with other Holo-Brick readers in the comments below.

Be the first to comment